1.26.2014

~70~ Flowering Cupcakes


Who doesn't love a cupcake? 
I mean, they're pretty, just the right amount of cake for 1 person, and delicious!

In this weeks class, I finally learned how to frost a cupcake like a pro.  It's actually much easier than I thought it would be.  Easier than decorating a whole cake at least.  In addition to frosting them, we also filled them. 


For my cupcakes, I chose Target brand's Chai Spice cupcake mix with a vanilla bean filling and vanilla buttercream frosting. 


The different techniques that we learned were the traditional swirl-who knew such a beautiful design was so simple to do?  I feel like I could be the next Cake Boss. 


My favorite design that really makes the cupcakes look like a pro did them is the drop flower.  It took a few tries to get it looking just right, but they are so pretty.  


The last technique was the mum.  This was a struggle for me to get looking just right.  The first few turned out looking like Cousin It, and not a beautiful flower.  I'll have to work on that one for next time.

They look almost too pretty to eat, don't you think?

It's hard to believe the class is almost over!  Next week is our last session where we'll be learning how to make ribbon roses!

Until then, 


1.18.2014

~69~ Making My Cake and Eating It Too


Not too shabby, if I say so myself. ;)

Ok, but honestly, decorating cakes is way hard.  And I am no where near becoming a pro as suggested in last week's post. 

I was super excited for this class.  I was actually counting down the days/hours until I got to work on my cake.  I baked a white cake with almond flavoring on Tuesday night.  I also got my batches of buttercream ready to go in black, orange, yellow, and teal.  I had originally wanted the penguin scarf to be teal and grey, but I ran out of black dye.  

On Wednesday, I showed up to class with my baked, unfrosted cake.  It was so helpful having someone show me some of the nuances in technique to really perfect the pristine look of a beautifully decorated cake.  It was by no means perfect, but it was the best looking cake I've ever done.  The trick is really in the paper towel.  When I went to buy the Viva brand (this is important) paper towels, they only had packs of 6 that cost $15.  Sorry, but no.  I figured I'd be okay without it, and decided to leave them behind.  However, when I was looking for tupperware containers, I spotted the Viva logo in the napkin section.  Turns out they also make boxes of napkins that are the same material as the paper towels, so I snatched up a box of those for only $2.99!

Here's what my cake looked like before I used the paper towel:  


Here's what it looked like after:
*Note, I forgot to take a picture after, but you can see in the final product how smooth I was able to get the frosting.


Once my cake was filled and frosted, it was time to let the decorating begin.  The night before, I found this adorable little penguin, which I thought was fitting for a winter cake.


The gel transfer trick is pretty darn nifty.  In the past, I have used a toothpick to lightly etch out the pictures I want, but this is so much easier.  All I had to do was trace the penguin onto parchment paper. Then I traced over the design with piping gel.  Flip that onto the cake, gently pat down with your hand or a paint brush, and voila! your image is on your cake, ready to outline with buttercream.  The image I used was a little small/detailed, and I think that it would have turned out nicer or cleaner had I used an image with less lines.  

I was only able to get the penguin outlined in class (2 hours FLEW by), so I finished up adding color, border, and the polka dots when I got home.  I'm not that happy with how the snowflakes turned out-they're not as uniform as I would have liked.  I also wanted them to be more blue, but didn't want to make a whole batch of frosting again.


I haven't cut into the cake yet.  Jake and I just finished an Advocare cleanse on Wednesday, so we're waiting until Sunday when we can share it with his family. 

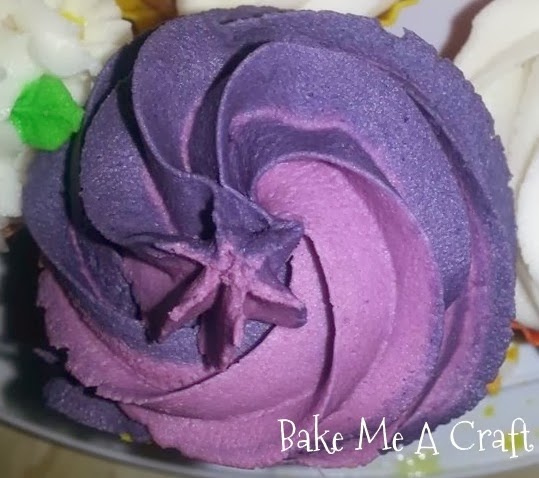
Next week, I'll be learning how to decorate cupcakes with beautiful flowers.
Until then, 


1.08.2014

~68~Becoming a Wilton Pro

Okay, well maybe not a pro, but I'll at least be one step closer to one!


As mentioned in a previous post, Jake got me a Wilton cake decorating class for Christmas!  Today, was my first class and I am already thrilled with it and can't wait to go back next week.

Originally, I was going to take the class at JoAnns (my favorite store), but the one closest to us does not offer it and I would have had to go to a store about 25 minutes from us.  Plus the only available time was on Fridays after work.  I decided to check Michaels to see what their schedules were like and found a class that is offered on Wednesdays from 6-8pm.  This works out perfectly with my schedule because I tutor until 5:30 and Michaels is on the way home.  

There are 4 classes-each 2 hours long.  In addition to registering for the class, I also got my course 1 student kit.


 I debated whether or not to get it since I already own about half of the items, but with a 50% off coupon, it ended up being only $17.50, which was more cost effective than buying the items I didn't already have separately.  Here's what's included in the kit:

1 Spatula
4 Couplers
12 tips in various sizes and styles
1 Cupcake nail
1 rose nail
2 featherweight (reusable) decorator bags
6 disposable decorator bags
6 parchment triangles
1 decorator brush (to use with gel transfers)
2 rose stickers
Various Reusable practice boards and stands. 

Additional items that I had to bring were a can of pre made Wilton icing to practice with, 6 flat/unfrosted cookies, the Wilton 1 course lesson plan.  We didn't really get to use the materials much tonight, but I did practice using the star tip (#18) using the practice board initially and then on our cookies. 


Otherwise,  class primarily focused on basics and tips for making a good cake that tastes great and is easy to frost, as well as how to make buttercream frosting in the right consistencies.  A lot of teacher talk/student watching, but the next 3 sessions are promised to be hands on.  

Here are the best tips I learned tonight: 

1. Stick your cake pan(s) in the freezer prior to baking-it will help it to cook more evenly and prevent the dome, creating a flatter top. 

2. After cooking for 10 minutes in the pan, flip onto seran wrap and place top side down on the counter.  This helps to lock in moisture and the weight of the cake helps ensure a flat top. 

3. Frosting really never needs to be refrigerated and can last up to 3 weeks (or frozen). 

4. My local library rents out specialty pans (think characters/shapes), so you don't have to buy a pan you'll only use once. 

Next week, we need to bring a baked, unfrosted cake to practice filling, frosting, and decorating using gel transfers. I'm so excited!

Until then, 


1.01.2014

~67~ 2013 Review

Happy New Year!!

I hope that 2013 was a great of a year for you as it was for us!  We spent New Years Eve with friends enjoying some good food, drinks, and playing games together.  It was a lot of fun!!

It's hard to believe that we've already gone through another year.  As cliched as it is, this past year flew by.  We celebrate love at 3 weddings, welcomed many new babies, and made many new memories with family and friends.  As I reflect back, there were so many wonderful things that we were blessed with this past year. 

1. Buying a house.
We absolutely love our house and all of the extra perks that go along with it.  We've hosted many dinners and get-togethers since closing in March, including our first Christmas dinner, we've been able to truly make it OUR home by adding paint, decorations, and personalizations that we just weren't able to do while living in an apartment.  Aside from getting married and having kids, I think that buying your first home is one of the biggest milestones that happens in your adult life.  It feels so good to have checked this one off of the list. That just leaves one more thing to do…


2. Expanding our family by adopting Viktor
  This also would not have been possible if it weren't for the house.  While we had a rough couple of months, Viktor has fully integrated himself into our family. He and Buckles are the best of friends and I love seeing Viktor's personality come out more and more each day.  It's hard to believe we ever were just a 1 dog family.  


3. Camp Invention. 
 This summer, I added another job title to my resume-Camp Director.  I was a little nervous going in, but it was a great experience and I'm so excited to see what this next year brings.  In addition, I've started teaching after school classes through the sister program, Club Invention, which I hope will increase enrollment in camp this summer.  One of my New Year's resolutions is to double (if not triple) my enrollment. 

4. Buying a new car
While the circumstances surrounding the need to get a new car were not that great, and yeah, having a car payment is not as fun, but the peace of mind in knowing that I can get an oil change without also having a problem reported is priceless.  It may not be the newest car (2009), but it's the newest car I've ever owned.  I've also never bought a car all by myself before.  Welcome to adulthood?!?


What were your favorites memories of 2013?


~66~ Gifts for a Baker

If all you had to get to know me were the gifts I received for Christmas, it'd be safe to say that you'd be able to determine that I like to bake.  Here's what I got: 

1. 4 Cookie Sheets

2. A new cake knife/spatula

3. Angled spatula

4. New revolving spice rack that measures out a 1/4 tsp at a time.


4. Christmas cookie cutters
 I've already put to good use the cookie sheets, cookie cutters, and spice rack making sugar cookies for our New Year's Eve party.

And best of all: 

A Wilton cake decorating class at JoAnns.  I have always wanted to take one, but have never taken the initiative.  Jake got it for me and has even agreed to take the course with me :)  I can't wait!


Related Posts Plugin for WordPress, Blogger...