Showing posts with label Wilton Cake Decorating Class. Show all posts

3.30.2014

~77~ Two's Better Than One

Cakes that is!

On Wednesday, I finished up the Wilton Cake Decorating Class, Course 2.  And what perfect timing that was since my birthday is on Saturday :)  Throughout the course, we learned how to use royal icing to make beautiful flowers and accents, which we used at the last class to decorate a cake as our final project.  We also learned how do the basket weave design and a couple of new borders that I also incorporated in my cake.
Many remarked that it was a bummer I had to make my own birthday cake, but then I quipped that I honestly love doing it.  I may have mentioned this in a previous post, but I always thought that getting to my a cake on my birthday was a treat for me.  I have always loved decorating cakes - but now, it actually looks like I know what I'm doing…sort of.

Here's how my final project turned out:


In addition to making a cake for my family birthday celebration, I made another one to bring to work and share with my coworkers.  Friday (the day before my birthday) also coincided with Iowa State's basketball team playing in the Sweet 16, so I decided it would only be fitting to make an ISU (birthday) cake.


Not only was some delicious cake had, but I also got spoiled by those dearest to me. 

A few week prior, I went home to MN to visit family and friends and celebrate my birthday with them. In addition to getting some much appreciated spending money, I also got my favorite perfume from Thymes, which is only available in MN (as far as I know), an adorable teapot, and my brother's homemade amazing root beer.  *Cue shameless plug: Seriously, if you're looking to make some one-of-a-kind beer, check out Vine Park Brewing Company in St. Paul, MN.  Jake and his groomsmen went there the day of our rehearsal dinner to brew some beer together, as well as bottle up a 6-pack into their own custom made bottles.  They still talk about how much fun they had almost 3 years later).  

Back home in Grimes, I had a second celebration with Jake's side of the family at our house, where I got some very generous gifts of lunch, Amazon and Bed Bath and Beyond gift cards, we well as Catching Fire on blu-ray! 

Jake really spoiled me this year
He got me a checker board cake pan set, a new walking/jogging belt that holds all sorts of stuff in it securely, Saving Mr. Banks on blu-ray, and best of all, a new cake supply caddy that I've been bugging him about.  During my eight weeks of cake class, I was carrying around all of my tips, colors, spatulas, decorator bags, and class kit in this green bag.  For this OCD girl, it was certainly headache inducing. 


Now, it's all neatly organized in this beautiful tool caddy: 

I have a designated spot for all of tips, colors, and frequently-used decoration tools in the top 

and extra storage underneath for all of the less frequently used items like my fondant, roller, piping gel, gum paste, and molds. 

The actual day was spent in pampering with a massage in the afternoon, dinner, sushi, and drinks at my favorite thai restaurant with the bestest friends, and then bowling and more drinks at the local bowling alley.  I'd say it was the most perfect day :)


2.02.2014

~71~Cutting the cake

Sorry for the delayed post! Things have been crazy busy between a math/literacy night at school, homework, getting ready for conferences, watching eating food at the Superbowl, and remodeling our guest bathroom and basement (I'll save that for another post).

Last Wednesday was my last cake decorating class.  We needed to bring a cake that was already baked, filled, and frosted, so I spent Monday night baking and Tuesday night doing the frosting.  I chose a marble cake and filled it with chocolate mousse.  I like to use the Dream Whip mix with instantly chocolate pudding.  It's super easy and tastes really good.


At class, we spent most of the time learning how to make ribbon roses.  Let me tell you, they are not easy!  It took a lot of work to consistently get them to come out nicely.  For myself, it was really squeezing the frosting with lots of pressure while turning the rose nail.  I probably did 479,084 of them before I got one that even resembled a rose.  But, by the time class ended, I had some presentable roses and a pretty nice looking cake.  After placing the roses, there were a lot of gaps, so I filled them with some pretty green leaves.

 I supposed I should give credit where credit is due.  The center rose was made by the course instructor.  She is not only a great cake decorator, but a fantastic teacher as well.

In addition to making my rose cake, I decided to show off practice some of my new skills on a Superbowl cake.  Using the gel transfer trick that I learned in week 2 of class, I put both team's logo in the center and used the team colors to create a pretty border.  The middle of each border was done using a #14 star tip. 

I enjoyed my time in class so much that I've already registered for the next level and will start again in March.

I also have some exciting things to share in the next couple weeks showcasing the changes we've made to our house.  
Until then, 


1.26.2014

~70~ Flowering Cupcakes


Who doesn't love a cupcake? 
I mean, they're pretty, just the right amount of cake for 1 person, and delicious!

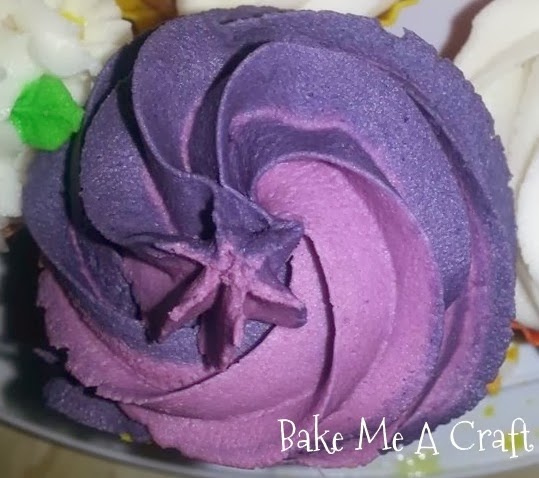
In this weeks class, I finally learned how to frost a cupcake like a pro.  It's actually much easier than I thought it would be.  Easier than decorating a whole cake at least.  In addition to frosting them, we also filled them. 


For my cupcakes, I chose Target brand's Chai Spice cupcake mix with a vanilla bean filling and vanilla buttercream frosting. 


The different techniques that we learned were the traditional swirl-who knew such a beautiful design was so simple to do?  I feel like I could be the next Cake Boss. 


My favorite design that really makes the cupcakes look like a pro did them is the drop flower.  It took a few tries to get it looking just right, but they are so pretty.  


The last technique was the mum.  This was a struggle for me to get looking just right.  The first few turned out looking like Cousin It, and not a beautiful flower.  I'll have to work on that one for next time.

They look almost too pretty to eat, don't you think?

It's hard to believe the class is almost over!  Next week is our last session where we'll be learning how to make ribbon roses!

Until then, 


1.18.2014

~69~ Making My Cake and Eating It Too


Not too shabby, if I say so myself. ;)

Ok, but honestly, decorating cakes is way hard.  And I am no where near becoming a pro as suggested in last week's post. 

I was super excited for this class.  I was actually counting down the days/hours until I got to work on my cake.  I baked a white cake with almond flavoring on Tuesday night.  I also got my batches of buttercream ready to go in black, orange, yellow, and teal.  I had originally wanted the penguin scarf to be teal and grey, but I ran out of black dye.  

On Wednesday, I showed up to class with my baked, unfrosted cake.  It was so helpful having someone show me some of the nuances in technique to really perfect the pristine look of a beautifully decorated cake.  It was by no means perfect, but it was the best looking cake I've ever done.  The trick is really in the paper towel.  When I went to buy the Viva brand (this is important) paper towels, they only had packs of 6 that cost $15.  Sorry, but no.  I figured I'd be okay without it, and decided to leave them behind.  However, when I was looking for tupperware containers, I spotted the Viva logo in the napkin section.  Turns out they also make boxes of napkins that are the same material as the paper towels, so I snatched up a box of those for only $2.99!

Here's what my cake looked like before I used the paper towel:  


Here's what it looked like after:
*Note, I forgot to take a picture after, but you can see in the final product how smooth I was able to get the frosting.


Once my cake was filled and frosted, it was time to let the decorating begin.  The night before, I found this adorable little penguin, which I thought was fitting for a winter cake.


The gel transfer trick is pretty darn nifty.  In the past, I have used a toothpick to lightly etch out the pictures I want, but this is so much easier.  All I had to do was trace the penguin onto parchment paper. Then I traced over the design with piping gel.  Flip that onto the cake, gently pat down with your hand or a paint brush, and voila! your image is on your cake, ready to outline with buttercream.  The image I used was a little small/detailed, and I think that it would have turned out nicer or cleaner had I used an image with less lines.  

I was only able to get the penguin outlined in class (2 hours FLEW by), so I finished up adding color, border, and the polka dots when I got home.  I'm not that happy with how the snowflakes turned out-they're not as uniform as I would have liked.  I also wanted them to be more blue, but didn't want to make a whole batch of frosting again.


I haven't cut into the cake yet.  Jake and I just finished an Advocare cleanse on Wednesday, so we're waiting until Sunday when we can share it with his family. 

Next week, I'll be learning how to decorate cupcakes with beautiful flowers.
Until then, 


1.08.2014

~68~Becoming a Wilton Pro

Okay, well maybe not a pro, but I'll at least be one step closer to one!


As mentioned in a previous post, Jake got me a Wilton cake decorating class for Christmas!  Today, was my first class and I am already thrilled with it and can't wait to go back next week.

Originally, I was going to take the class at JoAnns (my favorite store), but the one closest to us does not offer it and I would have had to go to a store about 25 minutes from us.  Plus the only available time was on Fridays after work.  I decided to check Michaels to see what their schedules were like and found a class that is offered on Wednesdays from 6-8pm.  This works out perfectly with my schedule because I tutor until 5:30 and Michaels is on the way home.  

There are 4 classes-each 2 hours long.  In addition to registering for the class, I also got my course 1 student kit.


 I debated whether or not to get it since I already own about half of the items, but with a 50% off coupon, it ended up being only $17.50, which was more cost effective than buying the items I didn't already have separately.  Here's what's included in the kit:

1 Spatula
4 Couplers
12 tips in various sizes and styles
1 Cupcake nail
1 rose nail
2 featherweight (reusable) decorator bags
6 disposable decorator bags
6 parchment triangles
1 decorator brush (to use with gel transfers)
2 rose stickers
Various Reusable practice boards and stands. 

Additional items that I had to bring were a can of pre made Wilton icing to practice with, 6 flat/unfrosted cookies, the Wilton 1 course lesson plan.  We didn't really get to use the materials much tonight, but I did practice using the star tip (#18) using the practice board initially and then on our cookies. 


Otherwise,  class primarily focused on basics and tips for making a good cake that tastes great and is easy to frost, as well as how to make buttercream frosting in the right consistencies.  A lot of teacher talk/student watching, but the next 3 sessions are promised to be hands on.  

Here are the best tips I learned tonight: 

1. Stick your cake pan(s) in the freezer prior to baking-it will help it to cook more evenly and prevent the dome, creating a flatter top. 

2. After cooking for 10 minutes in the pan, flip onto seran wrap and place top side down on the counter.  This helps to lock in moisture and the weight of the cake helps ensure a flat top. 

3. Frosting really never needs to be refrigerated and can last up to 3 weeks (or frozen). 

4. My local library rents out specialty pans (think characters/shapes), so you don't have to buy a pan you'll only use once. 

Next week, we need to bring a baked, unfrosted cake to practice filling, frosting, and decorating using gel transfers. I'm so excited!

Until then, 


Related Posts Plugin for WordPress, Blogger...